Growing Gourds
Bottle gourds are also known as hue in NZ.
The key to growing gourds is to create the longest season you possibly can so if you live in an area with frost, it's advised to start the gourd seeds off indoors and plant out only after the last frost has past. Depending on what area you live in, if it's in a climate like Nelson once the seedlings are planted they may sit dormant for a bit until the soil warms up but you'll still have enough time to grow a great crop of gourds.
Gourd Seeds
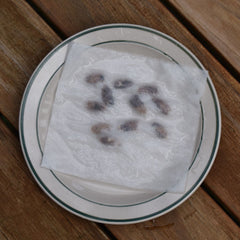
Important for successful seed germination: Soak seeds for 24 hours or overnight - you can use the saucer method as in pic below or just place in a cup of warm water and leave to soak, this will speed up the process of the seed sprouting otherwise it can take up to 10-14 days.
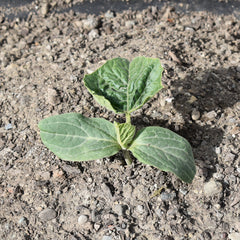
Sow at 2cm deep into seed raising mix with one seed per small PB bag or individual seedling containers, you can use a seedling tray but they must be transplanted before they grow their first leaves (what comes after the sun leaves) as they don’t like to have their roots disturbed. Keep in a warm sunny spot out of the frost. They’ll need lots of space like a cucumber, melon or pumpkin plant (they’re all in the cucurbit family) so plant out about 1 - 1.5 metres apart. Bottle gourds are heavy feeders so prepare the soil with lots of compost and aerated soil, then regular feeding every two weeks.
Growing structure for gourds
You can let the gourds grow on the ground but if you live in an area with higher rainfall, you may want to use a solid structure to grow on. Deer fencing or a chain link fence is ideal as it can handle the weight whereas chicken wire will need something else to hold the weight of the gourd when they are large and green. We grow on the ground and use bricks to lift each gourd up of the ground near the end of the season.
Pollination
You may need to hand pollinate to ensure you get a good crop. The gourd will grow from the female flower with the bulbus under the flower - You can see this in photo 3 below. Photo 2 shows you the male flower with the stamen that generates the pollen, pick one of the male flowers and peel back the petals to reveal the pollen and carefully insert into the pistil (photo 1 & 3) to pollinate.


When to harvest:
It's best to leave the gourds on the vine for as long as you can - at the end of the season the vine will start to take all the moisture back out of the gourd to assist it in drying, if you harvest the gourd too early then you'll have to air dry and this takes much longer. Leave until the leaves start to wither and die off and the stem starts to turn brown. You will be able to feel the gourds lighten up. The sun and rain will also help harden off the gourds and cure the outside but there's a fine line between drying and letting them rot.
Drying:
The gourds will still need to finish the drying process under cover for at least a couple of months. You can sit or hang somewhere dry with good airflow like a carport. Don't dry inside unless it's very well ventilated as the gourd still has a lot of moisture that slowly evaporates out and can cause dampness and mould in the house.
We use shelving out on a covered balcony away from the rain where we rotate once a week to avoid any soft spots or rotting. Airflow is important.
You'll be able to feel the difference between a dry gourd and one that's needs more time. A dry gourd will be brown, feel very light, sound hollow when you tap on it and you'll be able to hear the seeds when you shake - it's ready to start cleaning and creating.
Growing gourds is lots of fun, you can see the growth almost daily.